How to do a route assessment
 You need a bug out route assessment as part of your overall emergency evacuation bug out plan. If you find at some point that you have to Get Out Of Dodge and bug out to a survival shelter or another location, you don’t want to start thinking about how you’re going to get there as you’re grabbing your go bag during a natural disaster. Have a documented plan in place that anyone on your team can follow day or night and in any season.
The method I’m showing you is pretty much exactly how I’ve done it for the government – adapted for civilian use.
You can make your route assessment as basic or as thorough as you’d like. It’s simply a map of your route and a list of locations and turns for your route with notes about what you’ll find along the way. Both your map and list should stand on their own, not needing the other to understand how to get where you’re going. The plan I’m writing about here is for a thorough assessment in case SHTF but you could adjust it easily be simplified or used as an emergency response plan in case of natural disaster. You don’t need to go into as much detail as is listed, but it may save your life someday if you do. In order to plan an effective bug out route, you need to consider these five things:
Five Considerations for your Bug Out Route
- Where are you starting from?
- Your bug out route should encompass all the different locations that you may be when SHTF and you decide you need to activate the your bugout plan.- Where are you trying to go? If you don’t know where you’re going, you won’t be able to plan on how to get there. Do you have a specific location in mind or are you just looking for a safe harbor?
- Who are you planning on taking with you?
- More people means more security considerations and possibly more available options when SHTF but it also means more supplies and required coordination. If you’re bringing children along, this may affect your route or what you need to bring or stash along the bug out route.
- What transportation will you be taking?
- If you’re walking, you won’t be able to take as much as if you’re driving a route. If you have a 4wd, your options widen, especially during Winter or rainy months. You have to consider that your transportation options may change along the way, or even before you begin. What are you going to do if your car breaks down ten miles into your trip?
- What will you need to have with you?
- As you go through your plan, take each route individually and think of all the items you’ll need along the way. What’s important here is to consider what you’ll need if your plan falls apart for some reason. If your plan is to take your vehicle and your vehicle breaks down, did you plan on having the tools, training, and parts to fix it? If not, you’ll have to figure out another way. Make sure you plan on what to take in every case, overlap your requirements for each case, and decide what would make sense to take. You can’t take everything or plan for everything, but you can maximize your chances if you plan effectively. This is where you both refer to, and update, your bugout bag plan.
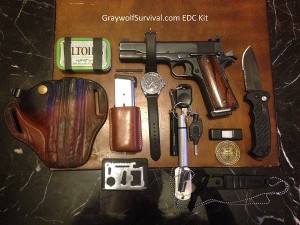
At minimum, during your assessment and if you ever actually use your bug out route, you need:
- A good compass. I use a Military Tritium Lensatic Compass
because it’s sturdy, reliable (it’s the same thing the Army gave me), and it’s easy to use. Plus it has tritium so you can see the dial at night.
- Water. You may want to look at planning a couple of cache locations for water if you live where water is scarce like I do in the desert.
- Your bug out bag (duh). If you want some help in figuring out what goes into your bug out bag, I have a full article on what you should consider as well as the top 10 best selling bug out items.
- Pen and paper to document anything along the way.
- Comms. I use a Yaesu FT-857D Amateur Radio
. It’s pretty awesome. If you don’t have one already, read my article on how to get a ham radio license.
There are five basic steps to making a route assessment:
Five Basic Steps of a Bug Out Route Assessment
-
Area Familiarization
-
Identify possible routes and prioritize
-
Document your prioritized routes on the map and the list
-
Run the routes
-
Complete the document
Area Familiarization
 The first step in your route assessment is to first get familiar with your territory and to identify points or areas of interest. Keep in mind the five things listed above. If you can’t visit in person at first, at least use something like Microsoft Streets and Trips to plan your route, but keep in mind the map is not the territory. Before you plan the route, you need to identify your areas of interest and take notes of each location. These notes are important to keep even if your route doesn’t go to all the areas beause you may need to find places or make adjustments to your route later on. Your points or areas of interest should include at least:
-
Starting Point(s)
-
End Point(s)
-
Rally Point(s) (Pre-planned locations of where you’ll meet up with someone along the route)
-
Friendly locations such as the homes of associates, hospitals, known remote locations (Go Points)
-
Unfriendly locations such as bad neighborhoods, places with no life support such as food and water (No-Go Points)
-
Choke Points (Places where you could be ambushed)
-
Water Crossings
-
Towns
-
Fuel, Water, and Food
-
Terrain Association Markers (locations or objects such as water towers that will help you figure out exactly where you are once you’re on the ground)
Identify possible routes and prioritize
Next, you need to identify some possible routes from your start points to your end points and take your areas of interest and your method(s) of transportation into consideration. Look at each route and analyze each area of interest along the way as much as you can using maps, imagery and in-person observation. This is where you start prioritizing your routes based on what you’ll find along the way. You should come up with at least three possible routes for any given location. Try to maximize the predicted friendly areas and avoid the predicted unfriendly areas.
Document your prioritized routes on the map and the list
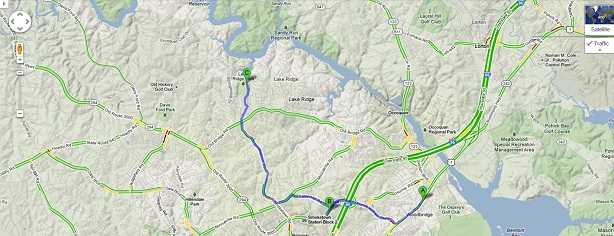
Now that you have your routes, you need to document them for reference. This is important because you may not remember all the details later on and the more you have documented, the easier it will be to adjust your plan when the situation changes. You should document a map overview with a colored line for each route, and a written plan. Google Maps has a great feature where you can put points into a map and it will give you turn-by-turn directions. You can even save the routes for later or email them to yourself or others.
Your written route should be listed from start to finish, with a new line for each turn and area of interest you come to. These lines are called ‘legs.’ Each line should tell you where you are, how to identify that you’re there, which direction to go, and how far, how long you’ll be going along that leg, and any relevant notes.
-
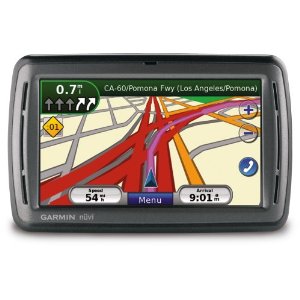 Where you are: This is simply how to identify the location. It could be a turn, a town, a checkpoint, a water source, whatever. You should include a grid coordinate if possible so you can back up your written plan with your map and/or a GPS. The best selling camping/hiking type is the Garmin Foretrex 401 Waterproof Hiking GPS
. The best selling one for your vehicle is the Garmin nüvi 52LM 5-Inch Portable Vehicle GPS
.
-
How to identify that you’re there: You need to be very clear how to identify your location so you don’t make the wrong turn. Keep in mind that when you run your route, it could be dark, there could be construction, or someone else could be using your route that has never run it.
-
which direction to go: Mark down both the turn direction (right/left/straight/second right, etc) and the cardinal direction (north/north-northwest etc)
-
How far and how long: The how far should be fairly straightforward. It’s the distance between this point and the next point. The how long will be dependant upon the time of day, traffic, and your speed.
-
Relevant notes: You should note on here anything along the way that helps you know you’re on the right route as well as important considerations like whether there’s a danger of muddy conditions if it rains, what kind of people are in the area, traffic patterns, what areas of interest are nearby that are not along the route, what you should notice right before your next leg so you know it’s coming up, and how you would know you missed your turn.
Run the routes
Now you need to walk or drive each of your routes; each leg that you will take, including any possible detours if you think you may need them. As you get to each point of interest, take a picture with descriptions to place in your relevant notes and as attachments with your map; enough so that you could just hand the map and route to someone and they could follow them at night if they’ve never been there. You may even want to videotape the route as you go, at least for the important parts. With a videotape, you can go back through it later and identify things such as route markers, terrain conditions, or stores that you didn’t plan on originally. This is also where you figure out about how long each leg takes so you’re less likely to miss the next turn or important point of interest. This is also when you find out that the gas station you were planning on using was closed down six months ago.
Complete the document
Your finished map should be put into something like powerpoint. You should have an overview map that contains the whole territory, and then each leg should have it’s own map afterward. Powerpoint lets you place notes in each slide where you can list your relevant notes for each leg. The written route should be in the form of a list of paragraphs along with photos. I would suggest putting the photos for each location right with the paragraph instead of referring to photos in the back so you don’t have to keep flipping back and forth as you go. Make sure your areas and points of interest are easily identified on the map. You may want to color code go areas and no-go areas differently. Once you’ve completed the bug out route assessment, try to follow your route with it – or better yet, have someone else run it and give you feedback. What seems well-organized in your living room could be very confusing when you actually drive it.
Your route assessment should be a part of an overall bugout plan because you need to pack what you’re taking in your go bag based on what you’ll find along your route, you need to come up with a communication plan to be able to coordinate and meet up with others at your rally points, and may also need to use the route to figure out where to place caches of food, water or other supplies along the route to ensure you’ll have them if you happen to start off unexpectedly. The whole plan should fit together as a complete system.


What is the cost of this information?//
What information?
Graywolf
If shtf, in your professinal opinion how could I get myself and family out of sw florida to my farm in southern wv.
Thank You in advance for any advice.
No way to answer that. No way to know what the situation is or what you’d face. You have to be adaptable.
if there were to be a disaster at night would moving my wife and 3 kids in the dark be wise or wait for day light
In “Five Considerations for your Bug Out Route” pleaze tell us the Fifth consideration
Hmm. There used to be five. I’ll have to put this on my list of things to do soon. Thanks for the heads up.